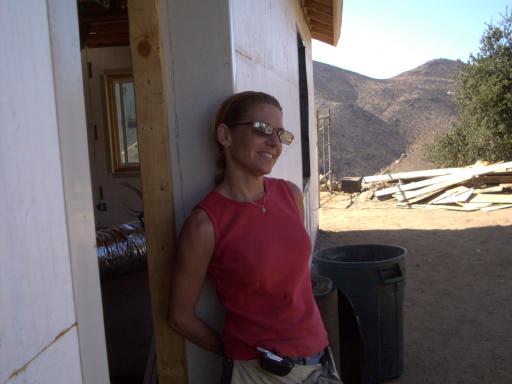
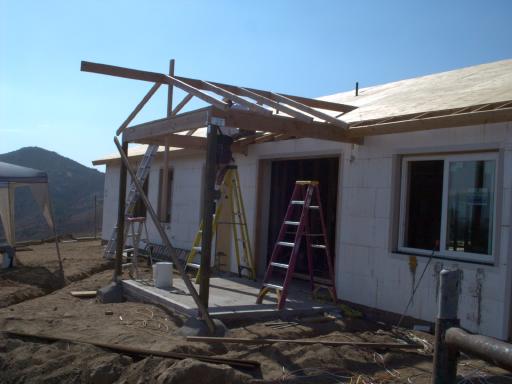
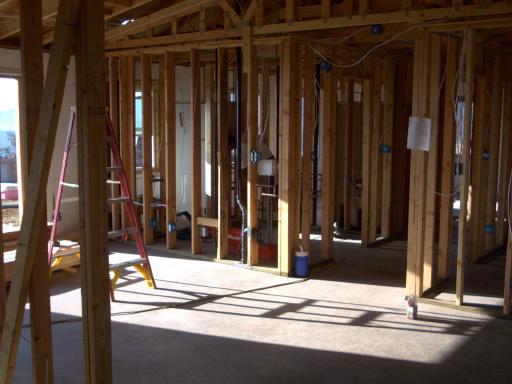
One of the very best things about my house is that it has a ton of glass facing east, so in the morning I wake up to a veritable avalanche of sunlight. It's a wonderful way to start the day, and I highly recommend it. We can see here that Rosemarie has the same opportunity, but with the addition of a simply glorious view of the mountains. Imagine waking up to THAT in the morning! I'm so jealous.

Again, I wanted to illustrate the complexity of what goes on behind the drywall in a typical house. The ductwork shown carries the hot (and cold, if Rosemarie installs air conditioning) air to all rooms. This is just one of many systems hidden in the walls/ceilings of every house. Look at the wall nearest to you, the ceiling above you...what's back there? We plug stuff in, turn up the A/C, assume hot water is available, wash the clothes, put stuff down the garbage disposal, and rarely think about how all that stuff functions. Mostly the nuts and bolts are hidden behind the drywall. Think about it next time you turn on a faucet or plug in yet another gadget.


You can see here how wonderful the back porch is going to be, with the tremendous view and the incredible morning sunlight, but it will get hot in the summer and needs a proper roof. Unlike the cheesy sheet aluminum roof over my back porch, we'll properly frame this one and attach it to the main house structure. Here Mike, Terri and Glenn discuss how it needs to be framed. You can see the footings we poured last week, complete with the rebar which will permanently attach the front end of the roof framing. It's a small crew today, but that might be a good thing...it seems like a small bunch of committed people can often get as much quality work done as a larger group of wannabes.

Unfortunately, we did a little bit too good of a job framing the roof of the main house, and we'll need to remove a bit of the fascia from the ends of the trusses in order to frame in the back porch. Here I am (damn Terri still doesn't ask permission to use my camera!) removing nails to get down to the rough framing so we'll have something to attach the porch roof to, making it a permanent part of the house. The sky was an incredible shade of blue today.


So let's get to work. Here Glenn and I plumb a vertical post, while holding a horizontal beam horizontal. Everything looks off kilter, but I blame Terri for not holding the camera level. That's my story and I'm sticking to it.

Terri takes a breather. It's a long day, you gotta pace yourself.


As often happens, the specs changed while we were building. In this case, the architect decided to move the toilet from where we'd placed it. No problem, except that concrete's been poured right where he wants it now, and we need to get a drain pipe in there for it. So sometime in the past week, the crew brought in the ole concrete saw and cut a hole, and a new drain was installed where the toilet is supposed to go now. Any OTHER whims you'd like us to cater to??

Ah, everybody's favorite time on the worksite...lunchtime! In addition to having a few minutes to rest and get ready for the afternoon's work, it's a good opportunity to evaluate the morning's work and figure out how the rest of the day's work will unfold. Since the roof has been complete and the hot weather has set in, we usually eat in the shade indoors. Here Terri, Mike and myself discuss the day's work....Glenn had to head home for something or other. Slacker!


Mike and the plumber discuss the overall plan for the master bathroom, including the relocated toilet. I'm still amazed how much goes on inside the walls!

We couldn't quite get the far beam on the back porch to seat in its brackets, so Terri and Mike hooked up the 'come-along' to gently coerce it into place. (Seriously, that's what it's called.) A little steel strength and leverage popped that baby right into place. It's square now.


Glenn came back from his appointment and seemed to want to do some work, so we sent him up on the roof, where he obviously wasn't very comfortable. The nail sticking up near his hand is the exact point where the roof of the porch will meet the roof of the house, and I'm measuring to see where that rafter will cross the fascia of the main roof framing. It's all very scientific.

Here Terri works on....oh who cares what?


Glenn and I make sure the ridge beam is square, level and plumb, and then secure it with nails. Don't you just love the jargon? Good thing my ladder isn't one step shorter.

Okay, I see what she's doing now. She's making sure the insulated and foil-wrapped ductwork is secured to the vents. If one of those comes off, you wind up heating/cooling your attic instead of the living space. Not a very wise way to spend your hard-earned dollars! Strangely, you can't use 'duct tape' to secure ductwork, it won't survive the heating-cooling cycles. You need to use foil tape instead.


Mike and Glenn figure out how to make the 'jack rafter', which is the complex one that runs up the intersection of the porch roof and the main roof. It requires 'compound miter' cuts on both ends since it meets sloped surfaces in both axes. I'm glad Mike was there to figure it out.

Here's a good shot of the porch framing we finished today. Mike and Glenn are still tinkering with the jack rafter on the other side...you can see the valley where the two roofs intersect on this side, where the jack rafter on this side will run. Looks pretty good, eh?


"From what we get, we can make a living; what we give, however, makes a life." -- Arthur Ashe


September 22, 2004: A frame rises from the rubble


September 28, 2004: Finishing the roof framing


October 5, 2004: Roof sheathing goes on


October 6, 2004: More finish framing


October 12, 2004: Framing the back porch


October 26, 2004: A slow, wet day


November 2, 2004: Bricks on the roof?


November 30, 2004: The walls get sticky


December 7, 2004: Plumbing and wiring the pump house


December 14, 2004: Paint goes on